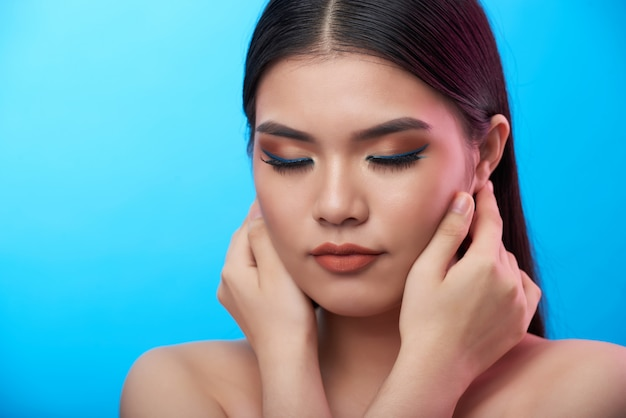
Winged Eyeliner Gone Wrong? Learn How to Fix and Perfect Your Look
Have you ever attempted the glamorous winged eyeliner look, only to end up with uneven lines or smudged edges? Don’t worry, you’re not alone! Winged eyeliner can be tricky to master, but with the right techniques and a few handy tips, you can fix and perfect your look. In this guide, we will explore common mistakes in winged eyeliner application and provide you with valuable insights on how to correct them. Say goodbye to smudges and crooked wings, and say hello to flawless and fabulous eyes!

Understanding Winged Eyeliner
To start our journey towards perfecting your winged eyeliner, let’s first understand what it is and why it is such a popular makeup trend. Winged eyeliner involves extending your eyeliner outward, creating a subtle or dramatic flick at the outer corner of your eyes. It adds a sense of allure and can make your eyes appear more defined and captivating.
Common Mistakes and How to Fix Them
Fixing Uneven Wings
One of the most common issues with winged eyeliner is achieving symmetry. To fix uneven wings, start by using small, light strokes to create the outline and gradually build up the shape. If one wing appears longer or higher than the other, use a cotton swab dipped in makeup remover to gently adjust the shape until they match.
Smudged Eyeliner Woes
Smudged eyeliner can instantly ruin your overall look. To fix smudges, dip a clean angled brush in some concealer and carefully trace along the edges of your eyeliner to clean up any mistakes. Additionally, setting your eyeliner with a matte eyeshadow of the same color can help prevent smudging throughout the day.
Tips for Achieving the Perfect Winged Eyeliner
Prep Your Eyelids
Before starting your winged eyeliner application, ensure your eyelids are clean and free from any excess oils. Use an oil-free makeup remover or micellar water to gently cleanse the area and pat dry. Applying a primer or setting powder can also help create a smooth canvas for your eyeliner.
Choose the Right Eyeliner Product
The choice of eyeliner product can greatly impact your winged eyeliner results. Gel eyeliners or liquid liners with fine-tipped brushes are popular choices for creating precise and sharp lines. Experiment with different formulas and applicators to find the one that works best for you.
Achieving a Flawless Eyeliner Look
Creating the Outline
Start by drawing a thin line along your upper lash line, gradually thickening it as you move towards the outer corner. This will serve as the base for your wing. Then, extend the line slightly beyond the outer corner of your eye, angling it upwards to create the desired wing shape.
Filling in the Wing
Once the outline is complete, carefully fill in the wing, ensuring that it is evenly pigmented. If needed, use short strokes to build up the color intensity and to refine the shape.
Winged Liner Tips: Set Yourself up for Success
Before we delve into fixing common winged eyeliner issues, let’s first explore some tips to help you achieve a flawless look from the start.
Invest in Quality Eyeliner Products
To create precise and long-lasting winged eyeliner, it’s essential to choose high-quality products. Opt for liquid or gel eyeliners with fine-tipped brushes or pen-style applicators for better control and ease of application.
Use Guide Tools
If you’re new to winged eyeliner or struggle with symmetry, guide tools can be incredibly helpful. Consider using adhesive stencils or placing a small piece of tape along the outer corner of your eye to act as a guideline.
Practice Makes Perfect
Mastering winged eyeliner requires practice. Take some time to experiment with different techniques, strokes, and angles to find what works best for you. Don’t be discouraged if it doesn’t turn out perfectly at first—remember, practice makes perfect!
Flawless Eyeliner: Achieving a Smooth Finish
Sometimes, achieving a flawless line can be challenging. Here are a few tips to help you perfect your eyeliner application:
Start with a Thin Line
Begin by creating a thin line along your upper lash line, gradually building up the thickness as desired. Starting with a light hand will allow you to have more control over the shape and prevent mistakes.
Create the Wing
Using the outer corner of your eye as a reference point, extend a line upwards and outwards to create the wing. If using a guide tool, follow its shape for precision. Adjust the angle and length according to your preference, keeping in mind that it should complement your eye shape.
Fill in the Gap
If you’re left with a gap between your lash line and the wing, carefully fill it in using small strokes, connecting the two sections seamlessly. Remember to blend the wing with the rest of your eyeliner to create a cohesive look.
How to Fix Smudged Winged Eyeliner: Quick Solutions
Smudging is a common issue when it comes to winged eyeliner, but fear not, as there are simple ways to fix it:
Q-tip or Cotton Swab
Dip a clean Q-tip or cotton swab into some makeup remover or micellar water. Gently trace over the smudged areas, erasing any unwanted marks. Be careful not to remove the entire line, only focus on the smudged parts.
Concealer or Foundation
If the smudging is minor, use a small concealer brush or a cotton bud dipped in concealer or foundation to carefully cover up the mistakes. This technique helps to camouflage any imperfections while giving your eyeliner a crisp, clean finish.
Correcting Uneven Winged Eyeliner Lines: Balancing the Look
Uneven winged eyeliner lines can be frustrating, but these tips will help you achieve balance:
Adjusting with a Cotton Swab
Dampen a cotton swab with a bit of makeup remover or micellar water. Gently lift the wing by running the swab along the bottom edge, correcting the angle and height until both sides appear even.
Conceal and Correct
Apply a small amount of concealer or foundation on a brush or cotton bud and trace along the bottom edge of the wing, gradually building up the product until both sides match. Blend the concealer carefully to ensure a seamless finish.
Tips for Perfecting Winged Eyeliner Technique
Before we dive into troubleshooting and fixing winged eyeliner mistakes, let’s explore some expert tips to help you perfect your technique from the start.
Choose the Right Eyeliner
Opt for a high-quality eyeliner product that suits your preference, whether it’s a liquid, gel, or pen-style liner. Different formulas offer different levels of precision and control, so experiment to find the one that works best for you.
Prepare Your Eyelids
Ensure your eyelids are clean and free of any oils or residue before applying eyeliner. This helps the product adhere better and prevents smudging. You can use a gentle eye makeup remover or cleanse your lids with a mild cleanser.
Use Short, Dash-like Strokes
Instead of attempting to create one continuous line, use short, dash-like strokes to build up your wing. This technique allows for more control and precision, especially when working on the delicate outer corner of the eye.
Expert Advice for Flawless Winged Eyeliner
Let’s explore some expert advice to help you achieve flawless winged eyeliner every time:
Practice Makes Perfect
Like any skill, mastering winged eyeliner requires practice. Set aside some time to experiment with different techniques and shapes. Don’t be discouraged if it doesn’t turn out perfectly at first; with practice, you’ll gain confidence and improve your technique.
Use Guide Tools
If you struggle with symmetry or creating a consistent wing shape, guide tools can be invaluable. Consider using adhesive stencils or tape as a guideline to help you achieve a precise and even wing.
Step-by-Step Guide for Winged Eyeliner Application
Follow these steps for a foolproof winged eyeliner application:
-
- Start with a clean eyelid. Remove any excess oil or makeup residue.
-
- Begin by drawing a thin line along your upper lash line, starting from the inner corner and extending towards the outer corner.
-
- Determine the wing’s angle and position by imagining a diagonal line from the outer corner of your eye towards the end of your eyebrow. This will serve as a guideline for creating the wing.
-
- From the outer corner, draw a line angled upwards, connecting it to the guideline you just created. This will be the initial outline of your wing.
-
- Fill in the wing by connecting the outline to the rest of the eyeliner along the lash line. Make sure to use short strokes for better control and precision.
-
- Review both sides and make any necessary adjustments to ensure symmetry and balance.
Winged Eyeliner for Small Eyes: Enhancing Eye Size
If you have small eyes, winged eyeliner can help create the illusion of larger, more defined eyes. Here’s how to make the most of your winged eyeliner for small eyes:
Opt for Thin to Medium Lines
To avoid overpowering your eyes, use thin to medium lines when applying winged eyeliner. This will maintain balance and prevent your eyes from appearing smaller.
Extend the Wing Gradually
Instead of creating a dramatic, elongated wing, extend the wing gradually and keep it close to the lash line. This technique will enhance your eye shape without overwhelming the space.
Winged Eyeliner for Round Eyes: Creating Definition
If you have round eyes, winged eyeliner can add depth and definition to your eye shape. Follow these steps to perfect your winged eyeliner for round eyes:
Start with a Thin Line
Begin by drawing a thin line along your upper lash line, starting from the inner corner and extending towards the outer corner. This will provide a base for your wing.
Angle the Wing Upward
To elongate your eye shape, angle the wing slightly upward as you extend it from the outer corner. This upward angle will create a lifted and elongated appearance.
Winged Eyeliner for Almond Eyes: Accentuating the Shape
Almond eyes are versatile and suit various eyeliner styles. To accentuate your almond eyes with winged eyeliner, follow these tips:
Embrace Bold and Dramatic Wings
Almond eyes can handle bolder winged eyeliner looks. Experiment with thicker lines and longer wings to highlight the natural shape of your eyes.
Extend the Wing Outward
When creating your wing, extend it slightly beyond the outer corner of your eye. This technique will emphasize the elegant shape of almond eyes.
Now that you have learned how to fix and perfect your winged eyeliner look, you are armed with the knowledge and techniques to achieve flawless results. Remember, practice makes perfect, so don’t be discouraged if it takes a few attempts to get it right. Embrace the process and enjoy the creativity that winged eyeliner allows. With patience and persistence, you will soon become a pro at creating stunning, winged eyes that enhance your natural beauty. So go ahead, embrace the winged eyeliner trend, and confidently rock your perfectly defined eyes!


